 |
| Carved Stamp |
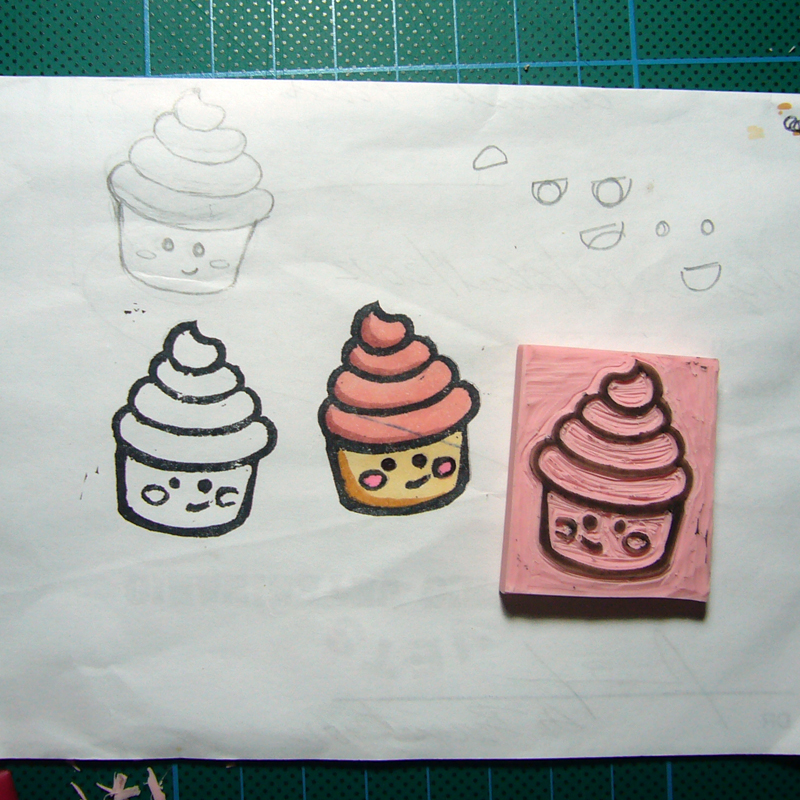
1. DRAW YOUR DESIGN
I decided to make a cupcake.
 |
| Cupcake, original design. |
2. TRANSFER YOUR DESIGN
I place my draw facing the carving block, rub the back with a bone folder (you can use whatever you have in hand). Make sure to lift it from a corner to check if transfer completely.
 | |
| Original design Nicole Stagg |
I cut around the design and start carving. It seems it's easier if you start with the smallest parts first.
 |
| Original design Nicole Stagg |
I test my stamp, and keep on carving on the sides, because when you press down the stamp, sometimes the borders aren't shallow enough. (as you can see below on the stamp, borders are black)


This mini cards are made with my new cupcake stamp, colored with copic markers and with gloss details in icing, cheeks and eyes.
Hope this inspires you to make your own stamps!!!!
If you want more inspiration you can visit Ishtar Olivera's blog where you can find all her amazing craved stamps and ideas.
No comments:
Post a Comment